Tools
Find useful B-roll with Premiere’s visual search
Turn a shot description into a shortlist, then check the action and usable range. Includes English search examples and a clearly labeled tea-footage exercise.
Describe the missing shot
Your narration says “pour the tea,” but the timeline needs a close-up of that action. A folder full of camera filenames gives you little help. Premiere’s AI-powered visual search can look for descriptions within footage imported into a project and return matching sections of clips.
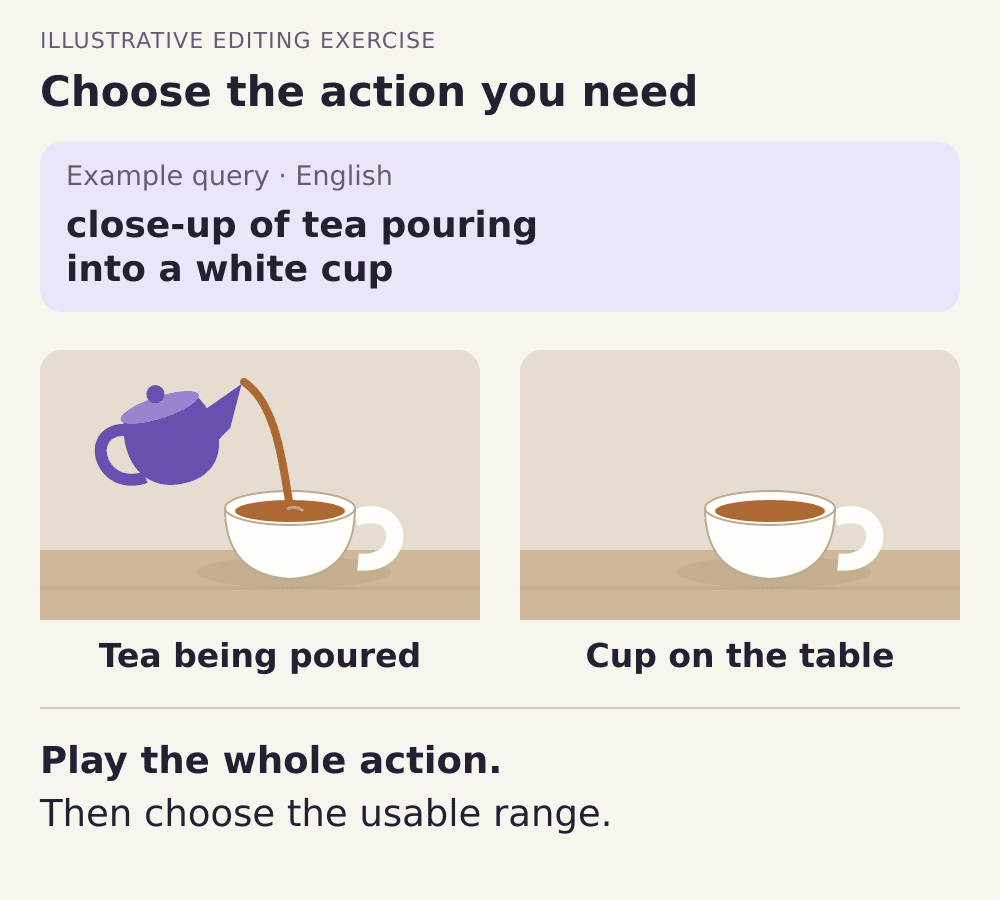
Start with the action the viewer needs to see. For this guide, imagine a library containing tea preparation footage: a pour, a cup standing on a table and several wider views. This is a proposed editing exercise, not a report of a creator’s results. We recommend using visual search to build a shortlist, then choosing the actual cut by watching the footage. For a handful of clips you already know, opening them directly may be quicker.
Let Premiere analyze the project
Use the desktop version of Premiere with access to the Search panel. Import the footage or open the existing project and let media analysis finish. Adobe places its progress in the upper-right corner; Window → Progress also opens the progress panel. You can keep editing while analysis runs.
If relevant clips are missing from visual results, check the preference “Analyze all imported media to visually search your projects” in Media Analysis & Transcription. Footage needs analysis before it can contribute visual matches. Open Search using the magnifying glass in the upper-right corner and focus on the visual results.
Search for what the camera can see
Describe the subject, action and framing. “Tea” leaves plenty of room for an unrelated cup or a wide kitchen shot. Try a multi-word description, then change one part if the results are too broad. Adobe recommends descriptive phrases and variations, including lighting or camera angle; similar English searches can return different results.
The examples below are query suggestions, not tested results. The last query deliberately asks for a different kind of shot. A still cup may work as a pause in the edit, but it cannot demonstrate pouring. Change the search to fit the shot’s job rather than accepting the first picture with the right object.
| Shot needed | English query | Check before keeping |
|---|---|---|
| The pouring action | tea pouring into a cup | Is the liquid entering the cup visible? |
| A closer view | close-up of tea pouring into a white cup | Are the action and cup both inside the frame? |
| A quiet cutaway | overhead view of a cup on a wooden table | Does this still moment fit the narration? |
Watch the whole usable range
Double-click a visual result to open it in the Source Monitor. Adobe says the matching range is marked with In and Out points, and one source clip can produce several visual results. Treat that range as a place to start reviewing.
Play through the action and the surrounding footage. For the tea example, check that the cup is visible before the pour starts and that the shot holds long enough after it ends. Watch focus, camera shake and anything that blocks the view. If the clip needs to sit under a caption, check where the words would go in the final crop. A related image can still be unusable for this edit.
Adobe explains that visual analysis uses a smaller version of the footage as a series of still images. Small details and fast motion can therefore be missed. Inspect a brief splash or a hand crossing the cup in playback. If a printed ingredient label matters, read it yourself: visual search does not use optical character recognition.
Choose the final range after this review and try it against the narration. Keep a little room around the action when the source allows it. If none of the matches shows the required step clearly, browse the likely clips manually or plan a pickup shot.
From match to usable shot
Proposed review for the tea example. Each decision happens in your edit.
Open the match
Load the suggested range in the Source Monitor.
Watch the pour
Check the full action, focus and final crop.
Choose the cut
Set a usable range and play it with the narration.
The search result is a candidate. These steps do not claim Premiere automatically approves or assembles the edit.
Keep the shortlist with the footage
Record the source filename, chosen In and Out points and a short reason for the selection. “Pour visible; cup stays in frame” is more useful later than “good clip.” Keep a rejected candidate only when the reason will help another editor, such as a hand covering the cup during the action.
If the project moves between computers, review Media Analysis & Transcription preferences before the next import. Adobe’s default Media Cache is local to each user. The sidecar option stores analysis beside the media in .prmi files, which another computer can reuse. Keep those files with the media when sharing. This helps preserve analysis work; your selection notes still need to travel with the project.
Before exporting, watch the chosen shot in the finished sequence. Confirm that the picture shows the step at the moment the voice describes it.